Ceramic Tile Shop Vacs: Fit the Job Right
By Diego Santana • 24th Apr
Ceramic tile work sits at an awkward intersection: you're dealing with wet tile dust collection from blade cutting, sweeping up bone-dry grout clouds, and often hitting both challenges in the same morning. A wet dry shop vac that makes sense for drywall cleanup will clog in minutes on tile slurry. A contractor's industrial unit might dwarf your van. And that adapter you grabbed last month? It doesn't fit the tile saw's 27 mm port.
I've learned to stop treating vac selection as a one-size-fits-most guess. Instead, I approach it like any other interface problem: measure ports, map adapters, then nothing surprises on-site. This comparative guide walks you through the real differences between ceramic tile vacs so you can pick the right machine before the job starts.
The Core Difference: Ceramic Tile Dust Is Trickier Than You Think
Ceramic tile generates two very different cleanup challenges that most general-purpose vacuums handle poorly.
First, there's tile saw dust control. A masonry blade cutting through ceramic or porcelain produces ultra-fine silica particles, thinner and sharper than drywall dust, and classified as a silica hazard by OSHA. For compliance setup details, see our OSHA-compliant silica dust vacuums guide. A standard shop-vac filter loads up within 20 to 30 minutes of active cutting. You need either a sealed cartridge filter rated for silica, a HEPA filter stage, or a pre-separator to extend filter life. Generic pleated filters fail here.
Second, there's the wet side: cleanup water from grout joints, adhesive residue, and the water used in some wet-tile-cutting setups. Tile work often mixes wet and dry in one job (cut dry, install wet, clean wet). Running a paper or standard cartridge filter through moisture ruins it permanently. You need either a foam sleeve, a sealed wet-rated filter, or the discipline to pull the wet-filter assembly mid-job and swap to dry.
A porcelain tile vacuum system that ignores one of these realities becomes either a clogged filter liability or a destroyed motor situation. The right choice splits the difference.
Sealed Suction vs. CFM: What Matters for Tile
Marketing loves headline horsepower and "peak CFM," but those numbers lie for tile work. What you actually need is sealed suction the ability to pull 60 to 80 inches of water lift consistently through a loaded filter and a hose run across a jobsite.
Why? A 36 mm hose (standard on mid-range shop vacs) supplying a tile saw across 30 feet of distance bleeds suction. See how hose length and diameter affect suction with practical guidelines. If your vac only rates at 100 CFM nominal and drops 20% across a hose run, you're left with 80 CFM, barely enough to clear a wet blade edge without the dust cloud drifting. A machine rated for 110 to 130 CFM sealed (not peak) stays effective.
For wet tile dust collection, sealed suction becomes even more critical. Moisture in the air stream increases friction in the hose. A vac with poor airflow specs will stall mid-pickup or fail to recover quickly after the operator stops.
Comparison rule: always ask for sealed suction and water lift specs, not peak numbers. Then subtract 15 to 20 percent for real-world hose losses. If a vendor won't publish sealed specs, move on, it's a red flag.
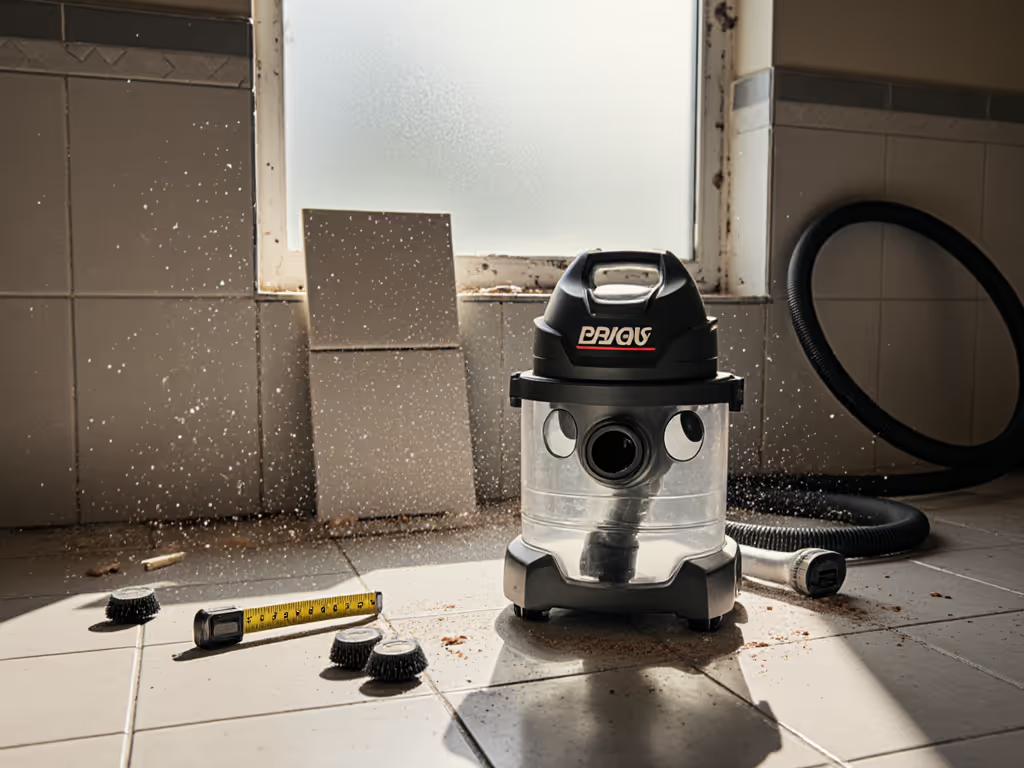
Port Sizes and Adapter Reality
Here's where most tile contractors hit a wall. A modern tile saw's dust outlet is typically 27 mm (metric) or 36 mm. A mid-size shop vac's inlet is often 1-7/8" (roughly 48 mm) or 2-1/2" (64 mm). A handheld angle grinder or polisher sits at 27 mm. Your stand-mounted wet saw might be 1-1/2" BSP threaded.
Adapters are plan A, not plan B, but only if you have the right ones before you arrive on-site. Use our vacuum hose compatibility guide to match ports and adapters fast. I learned this the hard way: I inherited four vacs and a drawer of random adapters, yet none fit our sanders or saws properly. I grabbed calipers and mapped every port: 27 mm, 36 mm, 1-7/8 in, 2-1/2 in. We standardized hoses, labeled reducers, and hung a fitment board in the shop. Cleanup time halved, and clog complaints vanished.
When comparing ceramic tile vacs, verify these specifics:
- Main inlet diameter and thread type (NPT, BSP, or push-fit)
- Tool port size on the vac itself (some models offer a 27 mm threaded tool port; others have only the large inlet)
- Hose inner diameter supplied or recommended (typically 27, 32, 36, or 42 mm)
- Reducer kit or adapter bundle included (does it cover 27 → 36 mm, or only 36 → 1-7/8"?)
- Hose couplers (some are friction-fit and leak; sealed, locking types maintain suction better)
A grout cleanup vacuum that ships with only a 1-7/8" inlet and no 27 mm reducer forces you to buy an adapter on the first day. A well-designed tile vac anticipates this and ships with both. Check the spec sheet or reach out to confirm before purchase.
Filter Strategy for Tile Dust
The single biggest complaint I hear from tile contractors is losing suction fast on a new vac. The culprit is almost always filter choice. Compare options in our filter guide: foam vs paper vs HEPA.
Standard pleated cartridge filters (the white ones that come in most shop vacs) are designed for general workshop dust, drywall, sanding, sawdust. They load quickly on fine silica and collapse under moisture. Replacing one costs $30 to $50, and doing it three times a week eats your margin.
For ceramic and porcelain tile work, compare these options:
HEPA-rated sealed cartridges: Capture >99.97% of particles down to 0.3 microns. They cost $50 to $100 per filter but last much longer on silica and are legally required for OSHA compliance on many tile and concrete sites. If your client requires silica containment, this is non-negotiable.
Foam sleeves (wet-rated): Reusable, hydrophobic foam that resists moisture and can be rinsed and wrung dry. Ideal for the grout-cleanup and slurry phases of tile work. Cost is $25 to $40 per sleeve, and they last a year or more with care.
Hybrid cartridges: A sealed outer layer with a foam backing. These handle both wet and fine dust reasonably well. Expect $60 to $90 per cartridge, but they can be a middle ground if you're mixing wet and dry tile tasks frequently.
Compare total cost of ownership: a cheap vac with frequent filter replacements often costs more over a year than a mid-range machine with efficient filtration.
Wet-Pickup Capability: More Than Just Draining
Not all wet dry shop vacs are equal in the wet department. For fundamentals and safety differences, see our wet vs dry vacuum guide. A machine rated "wet capable" doesn't always mean it's optimized for tile-work moisture.
Look for these features:
- Sealed motor head (so water doesn't drip into the motor)
- Drain port at the tank base with a proper spigot or twist-latch (prevents sloshing and contamination)
- Delivered with a foam sleeve rather than paper (standard cloth bags can retain moisture and smell within hours)
- Anti-static or conductive hose (wet conditions increase static risk; a metal-reinforced, ESD-rated hose prevents shocks on sensitive finishes)
- Float switch (optional but valuable, it auto-shuts the motor if water rises to a danger level)
A vac without these features will either damage the motor, clog the filter, or leave water pooling in the tank, breeding mold within 24 hours. For wet tile dust collection specifically, ensure the model you compare includes at least the drain port and foam-sleeve compatibility.
Auto-Start and Tool-Triggered Operation
Some tile contractors use auto-start systems to trigger the vac when the tile saw or polisher activates. Bosch's Bluetooth Dust Control Auto-Start System (GCA30-42K), for example, detects vibration from a power tool and wirelessly signals the vac to start. Milwaukee's VACLINK Wireless Dust Control Remote offers a similar range and magnetic mount for jobsite flexibility.
These systems shine when you're moving between multiple saw stations or polishing edges continuously. The vac runs only when needed, reducing motor runtime and filter loading. However, compare the activation lag some auto-start systems have a 1 to 2 second delay, which means a brief dust cloud can escape before suction kicks in. For ultra-fine tile silica, even a second matters.
If auto-start is important to your workflow, verify that the system is compatible with your tile saw and hose setup. Some require corded integration; others use wireless transmitters. Check whether the receiver connects cleanly to the 120V port on your chosen vac without daisy-chaining additional adapters.
Mobility and Jobsite Form Factor
Ceramic tile vacuum comparison charts often overlook the practical: will this machine fit in your van, stay upright on a sloped jobsite, and roll smoothly across uneven subflooring?
Compare:
- Tank capacity: Tile dust and water weigh more than sawdust. A 16-gallon tank might feel large but stay manageable; a 30-gallon tank can be unwieldy on stairs during a residential remodel.
- Casters and base: Look for locking casters rated for 300+ lbs, with good maneuverability. Tile work often happens in tight rooms; a vac with a narrow footprint and swivel casters wins.
- Cord and hose storage: Can you coil the power cord on the vac body? Does the hose hang on a hook without kinking? Small details save setup time across multiple jobs.
- Noise level: Tile saws and polishers are loud, but if your vac adds 80+ dB to a residential kitchen, clients notice. Compare models with mufflers or baffles rated below 75 dB if you work in occupied spaces.
- Weight: A 35 lb unit is portable; a 65 lb unit is a two-person job. Factor this into your daily logistics.
Interface-First Buying: The Fitment Board Approach
Before you buy, measure the exact ports on your tile saw, handheld grinder, polisher, and any other dust-producing tools. Write them down. Then pull up the spec sheet for each vac you're considering and cross-check:
- Does it have a 27 mm tool port, or will you need a reducer?
- Is the main inlet thread pattern (NPT or BSP) listed?
- What hose diameter does it use, and what adapters are included?
- Is the filter HEPA or silica-rated, or do you need to buy an upgrade?
- Does it have a drain port and foam-sleeve compatibility for wet work?
This takes 20 minutes and eliminates 90% of on-site surprises. When you arrive at the job, your hose plugs directly into the saw's outlet, suction is consistent because the filter is optimized for tile dust, and cleanup is faster because you're not fighting incompatible adapters or a clogged filter every hour.
That approach (precise diameters and tolerances, part numbers and model mappings, interface-first thinking) turns a ceramic tile vac from a generic purchase into a planned, dependable part of your workflow. Once you've mapped your ports and chosen the right machine, you'll spend less time managing dust and more time cutting and setting tile.
Next Steps: Build Your Fitment Map
Start by auditing your tile-work tools: tile saw, angle grinder, wet/dry polisher, mixer, and any cordless power tools used on-site. Measure or document their dust ports (calipers or a ruler will do). Download the spec sheets for three mid-range shop vacs (one budget, one mid-tier, one premium). Compare them side by side: hose diameters, filter types, wet capabilities, and included adapters. Then cross-check which machine's ports and hose fit your tools with the fewest adapters needed.
From there, build a small kit: the vac, the hose, the adapters that bridge your tools to the vac inlet, a backup foam sleeve for wet work, and a sealed cartridge filter for silica-heavy cutting. Label everything. Hang a photo sheet in your van or shop showing the fitment. That single step (knowing your interfaces before the job starts) transforms tile cleanup from frustration into routine.
Fitment drives performance. Plan your interfaces first, and the rest follows.
Related Articles