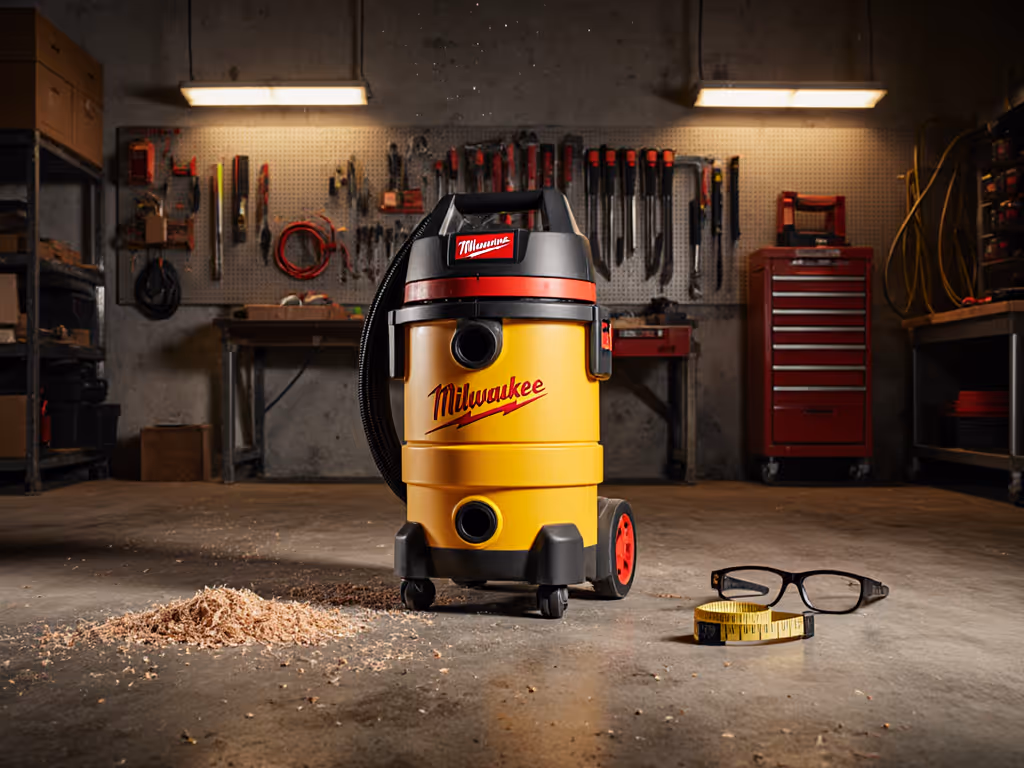
Milwaukee Modular Wet-Dry Review: Setup Checklist
By Aisha El-Sayed • 6th May
Introduction: Why Modular Matters
A Milwaukee Modular Wet-Dry review isn't just about specs on a spec sheet. It's about answering a real frustration: You buy a shop vacuum, unbox it, grab your power tool, and the hose won't seal. The filter isn't HEPA-rated. The adapters don't match your 27 mm sander port. You're already behind schedule.
I've seen this exact scenario cost crews more than the vac itself. Years ago, a masonry team on a site I was coordinating started a dry-cutting operation without thinking about dust control. No HEPA filtration in their vac. One surprise visit from the inspector, one citation, and suddenly they're dealing with fines and re-dos. That's when I realized: a modular vacuum system isn't a luxury, it is the difference between a compliant, professional setup and a costly scramble.
Milwaukee's modular approach (built around ecosystem integration and PACKOUT compatible vacuum features) addresses this directly. Instead of hunting for adapters and wondering if your filter meets OSHA silica standards, you plug into a matched system designed from the ground up for job-site reality. For concrete and masonry work, see our OSHA silica dust vacuum compliance guide for pass/fail setup requirements.
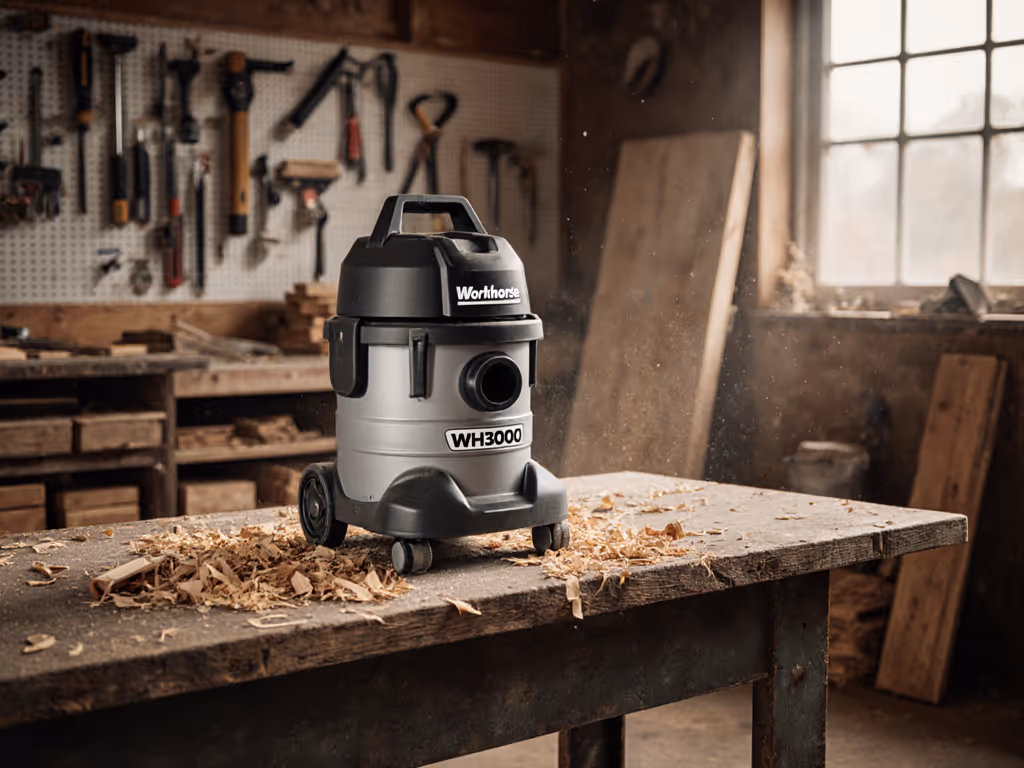
This review maps what you need to know to choose, set up, and maintain a Milwaukee heavy duty vacuum that actually works.
FAQ: Milwaukee Modular Wet-Dry Systems
1. What's a "Modular" Wet-Dry Vac, and Why Should I Care?
Modular means the vac is built to stack, swap, and scale. Milwaukee's approach centers on:
- Sealed joints and quick-connect ports that snap together without leaks
- PACKOUT-compatible bases so the vac mounts to your mobile cart or workshop wall
- Interchangeable filter cartridges (HEPA, fine-dust, foam, bags) for different mess types
- Cross-tool compatibility with sanders, grinders, demo saws, and wet pickups via standardized adapters
Why it matters: You're not buying a one-trick vac. You're building a system that adapts to drywall dust Monday, concrete Friday, and wet cleanup Saturday, all without losing suction or chasing replacement filters.
Seal every joint on purpose: that's not just a phrase; it's the difference between a vac that holds suction and one that just circulates the mess.
2. HEPA, Standard Filters, Foam Sleeves - Which Do I Actually Need?
This is where most crews guess and pay for it. Here's the plain-English breakdown: If you're unsure which media to run, use our shop vac filter comparison (foam vs paper vs HEPA).
HEPA Filtration (H13 or H14 standard):
- Removes 99.97% of particles down to 0.3 microns
- Required for silica/concrete dust, mold spores, and allergen work (OSHA standard)
- Costs more upfront but protects lungs and passes compliance audits
- Not optional if your site has an inspector
Fine-Dust or Standard Cartridge:
- Handles drywall, plaster, sawdust, general construction debris
- Captures ~95% of particles larger than 1 micron
- Good for indoor remodels where HEPA isn't mandated but air quality matters
- Clogs faster on fine dust, so you'll clean it more often
Foam Sleeve (Wet Pickup):
- Mandatory for water, slurry, or any liquid
- Paper filters + water = destroyed filter and motor
- Foam is washable and reusable; drains must be open
Bags (Disposable):
- For high-volume, low-mess jobs (yard debris, clean sawdust)
- Less frequent emptying but worse for fine dust control
- Dust plume when you pull them out, not ideal for occupied spaces
Risk Category & Action:
- Concrete/masonry/silica work → HEPA mandatory (pass/fail criterion)
- Drywall/plaster → HEPA preferred; fine-dust acceptable if you clean the filter often
- Wet → Foam only, drain open, never paper
- Generic debris → Standard cartridge, but keep HEPA backup on site
3. What's the Pre-Flight Checklist Before I Start?
This is where I translate "compliance" into a physical kit you can check off. Print this, label it, keep it on every job:
Vacuum Setup Checklist:
- Vac Model & Power Rating
- Verified CFM or sealed suction matches tool and hose length (longer hoses = lower effective suction)
- Wet-dry capable if wet work is in scope
- Capacity adequate for job duration (full tank = lost time)
- Filter System
- Correct filter type installed (HEPA, fine-dust, or foam, not guessed)
- Filter is clean and dry before startup
- Backup filter on-site (filters clog; downtime kills schedules)
- Replacement parts SKU noted for quick reorder
- Hose & Adapters
- Hose diameter matches tool port (1-1/4", 1-7/8", 2-1/2", or metric 27/36 mm)
- All connections hand-tightened + taped if not quick-connect
- Hose routed away from foot traffic and sharp edges
- Couplers secured (not loose, not falling off mid-job)
- Sealing & Air-Tightness
- Drain valve closed (if wet pickup)
- Lid locked or clamped down (no gaps)
- All joints visually inspected: no light showing through cracks
- Signature check: Seal every joint on purpose
- HEPA/Compliance Documentation (if required)
- Filter certification label visible and readable
- Setup photos or checklist timestamped for audit trail
- Site supervisor sign-off if compliance audit expected
- Safety & Mobility
- Vac positioned on stable, level surface (no tipping risk)
- Casters locked if applicable
- Power cord or battery fully charged and coiled safely
- Anti-static hose (if electronics/finish work nearby)
Time to complete: 5 to 7 minutes. Worth every second.
4. How Does "PACKOUT Compatible" Help Me?
Milwaukee's PACKOUT system is a modular storage and mobility standard. Get the full picture in our Milwaukee PACKOUT vacuum review. A PACKOUT compatible vacuum means:
- Stable mounting on your cart (no sliding, no tipping during transport)
- Organized accessory storage on or near the vac (filter backups, adapters, hose end in one place)
- Job-site mobility without dragging a hose everywhere
- Scalability (stack attachments and containers around the vac for a complete mobile unit)
Practical upside: You're not balancing a bulky vac on your truck bed or losing adapters in a van. You roll out a cohesive kit, set it up once per job, and focus on work, not equipment.
For crews running multiple sites or mobile services (auto detailing, facility maintenance), this saves hours per week and reduces "what's the adapter" hunting.
5. What's the Real Total Cost of Ownership?
Crews often pick a best shop vacuum based on initial price and regret it. Here's what to factor in: For a deeper look at ownership math, see our 5-year shop vac cost breakdown.
| Item | Typical Annual Cost | Notes |
|---|---|---|
| Vac (body) | $0 (amortized over 3 to 5 years) | ~$200 to $600 divided by lifespan |
| HEPA filters (2 to 3 replacements) | $60–120 | Consumable; clog rate depends on dust type |
| Foam sleeves (if wet work) | $20–40 | Washable but eventually need replacement |
| Adapter/hose repairs or replacements | $30–80 | Wear item; seal tape and couplers add up |
| Maintenance (motor/impeller cleaning, gasket renewal) | $50–100 | DIY or pro service |
| Total Year 1 (with vac) | ~$360–940 | Varies by job load |
| Total Years 2 to 5 (no new vac) | ~$160–340/year | Consumables only |
Hidden cost (ignored by most): Downtime from a clogged filter or missing adapter. If your crew loses an hour on a $50/hour job, that's $50 in lost revenue. A $15 backup filter on-site pays for itself instantly.
Containment first; cleanup is the insurance your lungs deserve. And insurance also means not losing work because your vac is down.
6. Wet-Dry Best Practices: What Actually Works?
I've watched plenty of vacs die early from wet-work mistakes. Here's the pass/fail checklist:
Before Wet Pickup:
- Drain valve is OPEN and clear (water pools = motor damage)
- Foam sleeve installed (not paper filter)
- Lid is airtight and sealed
- Exhaust filter guard in place (if applicable)
During Wet Pickup:
- Empty tank more often than with dry work (water adds weight; full tank overflows)
- Monitor suction loss (water clogging foam = reduced pickup)
- Turn vac off before emptying to avoid splashing
After Wet Pickup:
- Empty tank and run vac dry for 30 seconds to clear residual moisture
- Remove foam sleeve, rinse, and air-dry fully before storage (mold/odor prevention)
- Wipe down interior if slurry or fine sediment remains
- Leave drain valve open during storage (air circulation)
Red Flags (Fail Criteria):
- Vac smells like mold after wet work → foam sealed damp, stored wet
- Motor sounds strained or wet → water in motor; stop immediately
- Foam caked with sediment → filter degraded, time to replace
7. Milwaukee Modular vs. Other Workshop Vacuums - What Sets It Apart?
Milwaukee's Modular Strength:
- Ecosystem integration: If you already own M18 batteries or PACKOUT storage, the modular vac plugs in natively
- Port standardization: Adapters are fewer and more reliable; less chasing metric-to-imperial conversions
- HEPA certification availability: HEPA filter options come from the factory, not aftermarket hunts
- Sealed-joint design: Quick-connect couplers reduce air leaks and downtime
Trade-offs:
- Modular systems cost more upfront than generic shop vacs
- PACKOUT compatibility is a plus only if you're already in the ecosystem
- Smaller capacities (common in modular brands) mean more frequent tank emptying on high-volume jobs
When Milwaukee Modular Makes Sense:
- You run multiple tools and need quick filter/adapter swaps
- Compliance audits or OSHA silica work require documented HEPA setup
- You already have Milwaukee M18/PACKOUT gear (ecosystem leverage)
- Mobile/multi-site work where cart mobility matters
When Standard Shop-Vac Might Suffice:
- Single-user, single-location shop with one primary task (e.g., woodworking sawdust only)
- Budget-first DIY (no compliance pressure)
- High-volume, low-contamination work (yard debris) where HEPA isn't needed
8. How Do I Know If My Setup Will Pass an Inspection?
This is the compliance question I hear most. Here's how to build defensibility:
Documentation Trail (Compliance Pass/Fail):
- Photograph the assembled vac with all seals and filters visible
- Record the filter certification number (HEPA: typically H13 or H14 stamped on cartridge)
- Note the vac model, hose diameter, and adapters in a setup log
- Timestamp or date all of the above (for audit trail)
On-Site Red Flags (Fail Risk):
- Visible gaps or loose hose connections (inspector will notice)
- Non-HEPA filter on a silica/concrete job
- Paper filter installed for wet work
- No documentation of filter type or vac model
- Duct tape replacing a proper coupling (amateurish, risky)
Pass Criteria:
- Sealed, labeled HEPA filter visibly in place
- Hose and adapters secured with hand-tight + quick-connect or proper coupling
- Drain valve open (if wet) or closed (if dry)
- Vac model and filter type documented on-site
- No visible dust leaks or bypass
How to Choose Your Milwaukee Modular Setup: A Framework
Not every setup is identical. Use this framework to match your needs:
Step 1: Identify Primary Mess Type
- Concrete/masonry/silica → HEPA mandatory + sealed system
- Drywall/plaster → HEPA preferred + sealed system
- General construction + occasional wet → Fine-dust filter + foam backup
- High-volume debris + mobility need → Modular + PACKOUT cart
Step 2: Map Tool Compatibility
- List all power tools (sander, grinder, demo saw, etc.) and their dust ports
- Note port sizes (1-1/4", 1-7/8", 2-1/2", metric 27/36 mm)
- Verify vac adapters cover all of them (don't assume)
Step 3: Set Your Budget Tier
- Tier 1 (Under $300): Single-use, non-modular, standard filtration
- Tier 2 ($300 to $700): Modular, HEPA-capable, PACKOUT-compatible
- Tier 3 ($700+): High-capacity, industrial-grade, multiple filter options
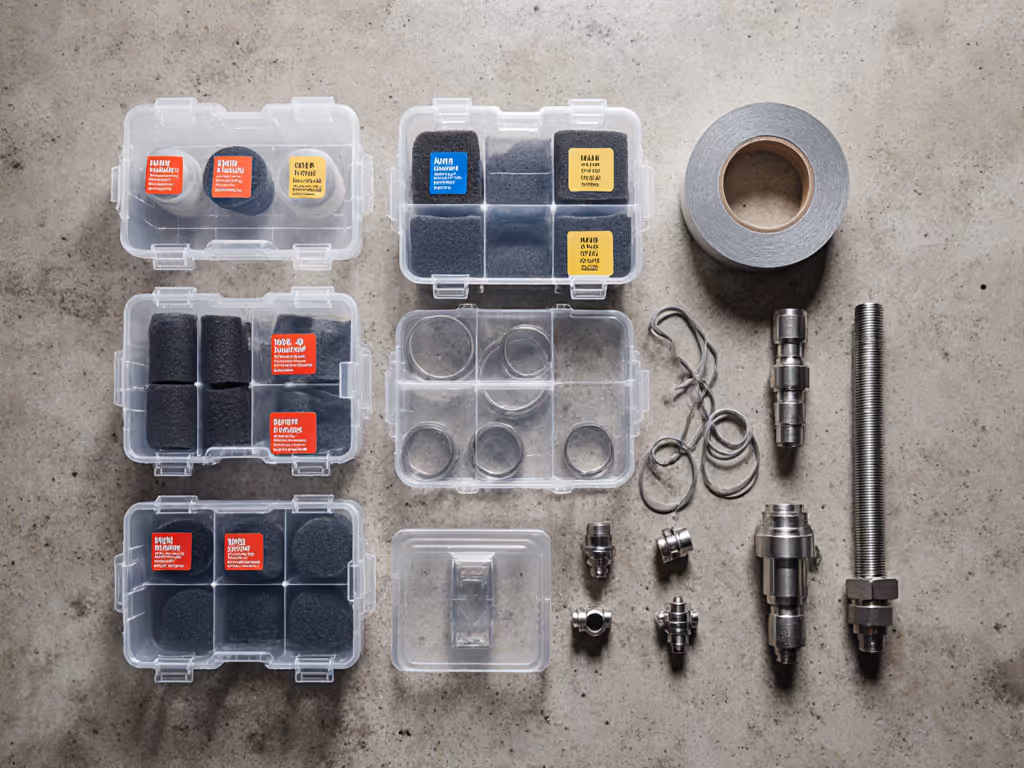
Step 4: Build Your Consumables Kit
- 2× replacement filters (same type as primary)
- 1× alternate filter (e.g., foam sleeve if your primary is cartridge)
- 1× roll of HVAC tape and 2× quick-connect couplers
- 1× hose end collection: 1-1/4", 1-7/8", 2-1/2" adapters
- 1× drain valve and gasket replacements
Step 5: Document & Label Everything
- Print and laminate your pre-flight checklist
- Label filter types with tape: "HEPA H13 - Concrete Only" or "Foam - Wet Only"
- Store adapter kits in labeled bags
- Keep vac model and filter SKU visible on the vac itself
Putting It All Together: A Real-World Scenario
Imagine you're a remodeling crew tackling a mixed job: drywall removal (dust), concrete grinding (silica), and some water damage cleanup (wet).
Setup Using Milwaukee Modular:
- Vac body: Milwaukee modular wet-dry (sealed system, PACKOUT base)
- Primary filter: HEPA cartridge (H13, for silica work; covers drywall too)
- Secondary filter: Foam sleeve (for wet phases)
- Adapters: 1-1/4", 1-7/8", 2-1/2" quick-connect couplers
- Hose: 1-7/8" diameter, 25 ft (matches sander and grinder ports)
- Cart: PACKOUT-compatible mobile base with accessory storage
- Documentation: Setup checklist photo, filter certification visible, model number labeled
Day 1 (Drywall Removal):
- Pre-flight check: HEPA filter installed, all joints sealed, drain closed
- Connect to remodeling sander: snap coupler, suction confirmed
- Hourly: tap filter (cartridge shock to shed dust, prevent clogging)
- Evening: empty tank, store filter dry
Day 2 (Concrete Grinding):
- Pre-flight check: HEPA filter intact, still clean enough for suction; seal joints
- Connect to angle grinder: coupler snaps; dust captured at source
- Midday: swap to backup HEPA filter (primary filter getting slow); deep-clean primary for tomorrow
- Evening: documented setup photo for compliance record
Day 3 (Wet Cleanup):
- Pre-flight check: Swap to foam sleeve, open drain valve, verify seal
- Connect to wet pickup hose; extract standing water
- Mid-task: empty tank (water adds weight; don't overfill)
- End of day: empty tank fully, remove foam, rinse and air-dry, store with drain open
Result: No scrambling for adapters. No guessing if you're OSHA-compliant. No "why is my vac clogged" panic. One cohesive, reusable setup.
Common Misconceptions & Reality Checks
Myth: "Higher CFM always means better suction." Reality: CFM (cubic feet per minute) is airflow at the motor; what matters is sealed suction at the tool. A long, small-diameter hose eats suction. A 200 CFM vac with a sealed hose and the right adapter beats a 300 CFM vac with loose couplers.
Myth: "HEPA filters are always overkill for general work." Reality: HEPA protects lungs on silica/concrete and passes compliance audits. Cost is ~$40–60 more per filter. Lung damage or a fine is far worse.
Myth: "I can use any adapter; hose diameter doesn't matter much." Reality: Wrong diameter = loose fit, air leaks, and suction loss. A 27 mm adapter on a 1-1/4" port leaves a gap. Tape helps but fails under pressure. Buy the right size.
Myth: "Modular vacs are just marketing fluff." Reality: Modular design means you're not buying a new vac when you change jobs or tools. Quick-change filters and sealed systems cut downtime and frustration.
Next Steps: Further Exploration
If you're evaluating a Milwaukee modular setup, don't rush. Use this framework:
-
Document your current tools and their dust ports. Write down every tool, every port size. This is non-negotiable.
-
Verify adapter availability before buying. Call the manufacturer or supplier: "Do you have a quick-connect adapter for a 27 mm port + 1-1/4" vac coupler?" If the answer is vague, walk away.
-
Check HEPA certification on the filter cartridge itself. Look for "H13" or "H14" stamped or labeled. Screenshot it for your compliance file.
-
Build your consumables kit now. Don't wait until a filter clogs mid-job. Buy backups and adapters upfront; store them labeled and ready.
-
Run a dry test. Connect all hoses, seal all joints, power on, and confirm suction at the tool. No surprises on the actual job.
-
Document your setup. Photo of the assembled vac, filter visible, all seals tight. Keep it in your mobile office or on your phone for inspections.
-
Join a trade-focused forum or community where crews share real Milwaukee setups, filter performance on specific messes, and adapter hacks that work.
Final Thoughts
A Milwaukee Modular Wet-Dry review isn't about hype. It's about honesty: Vacs fail when you guess on specs, skip HEPA, or chase adapters. Modular systems (when set up right) eliminate guessing.
I learned this the hard way on that masonry site. A simple kit (HEPA filter, sealed hose, right adapters, a checklist) prevented what became an expensive lesson. That's the goal here: give you the map so you never face that scramble.
Build your setup with intention. Seal every joint on purpose. Document it. Keep backups. And you'll not only pass inspections; you'll gain the confidence and uptime that separate professional crews from reactive ones.
Your lungs, your clients, and your schedule will thank you.
Related Articles